Keeping chickens in winter requires the creation of the right lighting, heating and food conditions. A room for these purposes can be built independently. In the article, we will consider how to build a winter chicken house with your own hands and how to properly equip it.
What is the difference between a winter chicken coop and a summer one
The main factors that distinguish the winter keeping of chickens from the summer are the lack of full natural light and heat. In the warm season, a fenced area with a canopy can serve as a chicken coop. With the advent of cold weather, basic conditions are not enough.
In connection with a drop in air temperature and a decrease in daylight hours, birds need to provide heating and light. It is also important to protect chickens from adverse weather conditions - wind, snow, rain and other precipitation.
Choosing the optimal location for the chicken coop on the site
For a chicken coop, it’s best to choose a place that is not shady, as the birds should receive enough natural light. To avoid the accumulation of excess moisture during rains and thaws, it is advisable not to place the house in the lowlands.
The optimal area is considered to be with dry soil, located in the upper part of a small slope. It is better to carry out the construction on the south side of the plot, the windows should also be facing south.
Important! Avoid wetlands and wet areas. If there are no other options, the territory should first be drained.
Size calculation
The size of the house and walking area depends on the number of chickens. Follow these calculations: for 1 chicken, you need to allocate 0.5 square meters. m of premises and 1-3 square meters. m open space. Indicators of the optimal size of the allocated area are described below in the tables.
Coop:
| Number of chickens | Size, sq. m |
| 10 | 5 |
| 20 | 10 |
| 30 | 15 |
| 50 | 25 |
| 100 | 50 |
| 200 | 100 |
Area:
| Number of chickens | Size, sq. m |
| 10 | 10–30 |
| 20 | 20–60 |
| 30 | 30–90 |
| 50 | 50–150 |
| 100 | 100–300 |
| 200 | 200–600 |
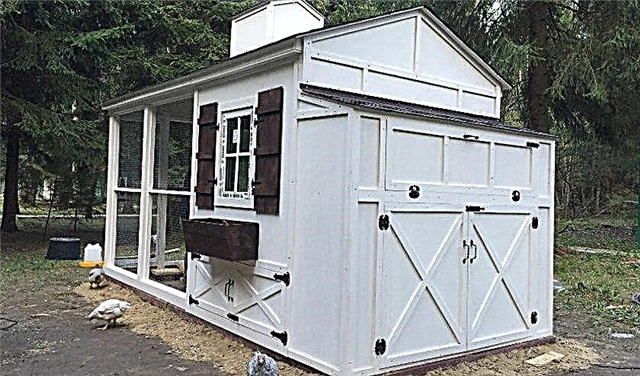
DIY winter house building
When building a winter coop on your own, you should pay attention to all the details of the structure: foundation, walls, floor, roof, ceiling, windows and doors.
Type of foundation
The basis of the construction is the foundation.
There are several types of it:
- tape - expensive and reliable;
- pile - relatively expensive and reliable;
- columnar - affordable and simple.
Did you know? The strip foundation is intended for large-sized buildings, such as houses.
To create a strip foundation, do the following:
- Use the pegs to make markings.
- Dig a trench along the perimeter with a width of 0.4-0.5 m and a depth of 0.5 m.
- Cover the bottom with sand (0.1 m), tamp.
- Install the frame from the reinforcement and wooden formwork.
- Make a mortar of concrete, water and sand.
- Fill the prepared trenches with a solution and leave until it solidifies completely.
 A pile foundation is less expensive than a strip foundation. Bored piles are suitable for building a chicken coop.
To construct this type with your own hands, follow the following procedure:
- Drill around the perimeter of the well. Diameter should be 0.3 m, depth - 5 m.
- Install the pipe as the formwork.
- For greater strength, install the reinforcement cage.
- Prepare a solution of heavy cement with sand or gravel.
- Fill the wells with cement and leave to solidify.
The most common solution is the columnar option.
To create this type of foundation yourself, you must follow the steps below:
- Make markup. To do this, drive wooden pegs or rods into the ground around the perimeter and pull 2 ropes along them. The first should be at ground level, and the second - 0.2-0.25 m higher.
- Remove a layer of the earth (to 0.2 m) on all area of a site.
- Along the perimeter, at a distance of 1 m from each other, dig holes for poles. Their area should be 0.5x0.5 m and a depth of 0.6-0.7 m.
- Prepare the base for the pillars. To do this, pour up to 7 cm of sand into each pit, then lay out up to 7 cm of gravel.
- Prepare a solution of cement in a ratio of 1: 3.
- Raise the columns. Put 2 bricks on the base, cement on top, then 2 more bricks and again cement. Continue until the bars reach the top rope.
- Leave the foundation until the cement hardens.
Do-it-yourself winter chicken coop: video
Walling
When building a house, the height of the walls must be taken into account. It should be taller than a person. The optimum height is 2–2.2 m. Before the construction, a plan is made, taking into account door and window openings.
The walls of the house can be built from different materials - most often resort to use:
- foam blocks;
- shellfish;
- brick;
- cinder blocks;
- tree.
The most reliable are foam blocks and bricks. These materials are relatively expensive, but will provide the building with durability. The best option, combining low price and quality, is wood.
Important! Wooden walls must be treated to protect the wood from harmful conditions.
For thermal stability and space heating in frost, the walls need to be insulated. For these purposes, mineral wool or polystyrene is usually used. The chicken coop walls made of wood are made two-layer, and the selected material is placed between the outer and inner layers.
Sizes of a chicken coop on 20 hens:

Masonry floor
There are several options for laying the floor. The level of thermal insulation and strength are determined depending on the material.
- Adobe floor. This option is a carefully compacted clay-sand mixture, which is laid on the soil without substrates and insulation.
- Single-layer floor from boards. Logs are installed on the foundation, on which wooden boards are laid. The joints between them should fall on the logs.
- Insulated two-layer floor from boards. In this case, the lags are also first strengthened on the foundation. Next, they lay a rough floor, lay a heater, for example, mineral wool, and put the final layer of boards on top.
- Concrete floor with insulation. First, lay the substrate, a heating system is installed on it. Next, the floor is poured with concrete mortar - its thickness should reach 30 mm and cover the "warm floor".
Roof device and ceiling
The ceiling is installed immediately after the construction of the walls. Beams are laid and fixed on them, on which a ceiling is superimposed. It can be made of any wood-containing material: boards, chipboard, OSB, plywood and others. The ceiling can also be insulated from above with any suitable material.
Roof for the chicken coop is preferred in single or double slope. The advantage of a pitched roof is the ability to equip an attic and use it to store feed.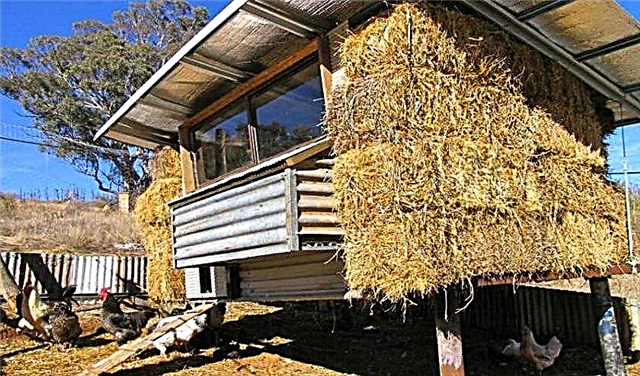
Doors and windows
Openings for windows and doors should be provided before the erection of walls. When the building is ready, you can proceed with the installation.
The size of the windows should be about 25% of the total area of the room. Thus, in the chicken coop of 20 square meters. m their area should be about 5 square meters. m. Window opening is preferably displayed on the south side. To insulate the gaps in the frame, you can treat it with sealant or use tape.
When installing the door, please note that it should preferably open outwards. The door leaf, like the window frame, needs to be insulated. To do this, you can use mounting foam.
Interior arrangement of the winter chicken coop
In addition to the basic design, no less important for chickens is the internal arrangement of the premises. Consideration should be given to ventilation, lighting and bedding options. For greater productivity of birds, it is necessary to create comfortable conditions and establish roosts, nests, feeders and drinking bowls.
Perches
Perches are located in the far corner of the chicken coop. They are made of wooden beams: the optimum section is 0.3x0.4 m.
Piles of bars are installed at a distance of about 0.3 m from each other. Each chicken should have 30 cm perch.
Nests
The number of nests is calculated depending on the number of chickens. For 10 birds, 2-3 places are usually set.
When equipping the premises, use the following calculations:
| Number of chickens | Number of slots |
| 10 | 2–3 |
| 20 | 4–6 |
| 30 | 6–9 |
| 50 | 10–15 |
| 100 | 20–30 |
| 200 | 40–60 |
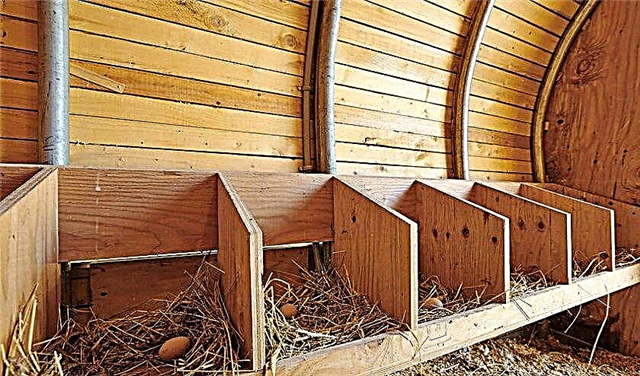 Various layers of nests are suitable for laying hens, which are selected depending on the preferences of the farmer:
- booths;
- with egg collectors;
- with a double bottom;
- from the boxes.
It is necessary to arrange the nests in a place protected from wind currents with minimal lighting.
Feeding troughs and drinking bowls
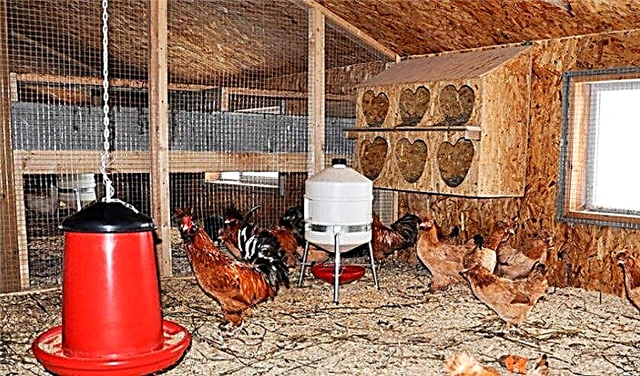
Feeding troughs and drinking bowls are recommended to be placed in different parts of the house, however they should not be in the aisle. Birds need to have free access to them.
For different types of feed, different types of containers are used:
- for wet food - a plastic feeder;
- for dry food - a long-form tree feeder;
- for freshly cut grass - a mesh feeder.

Ventilation
Ventilation in the chicken coop can be 3 types:
- Natural. This option is not the most reliable, but differs in budget. To circulate fresh air, you can use windows and install a through pipe in the wall under the roof.
- Artificial. For this type, 2 pipes are installed. The first is in one of the walls under the ceiling. The second is located in the second wall, its lower end is led above the floor, and the upper one is slightly lower than the ceiling. This design will allow air to circulate around the room.
- Automated. This option depends on the power supply and consists in the installation of an automatic ventilation system.
Important! Proper ventilation allows you to control humidity. The optimum moisture level in the house should be 60–70%.
Winter Coop Lighting
For these purposes, use lamps:
- energy saving;
- infrared;
- gas discharge;
- 40-watt fluorescent.
Important! It is not recommended to use incandescent lamps, as they cannot fully provide the necessary lighting.
The daylight hours should be 11-12 hours. To automate the control of lighting using temporary controllers.
Litter
Slaked lime can serve as a base litter. It is applied in a proportion of 1 kg per 1 square. m floor. The next layer is straw, hay or sawdust.
During the life of birds, sawdust is rammed. With the onset of cold weather they are laid out in a layer of 10 cm. Next, they add another 10 cm each month, after which, with the onset of heat, all sawdust is removed. This litter is also a method of insulation. Chickens love to rummage through sawdust, thereby warming themselves in the cold season.
Heating system installation
The heat in the chicken coop in the winter season guarantees bird productivity. If small poultry houses for personal use in small frosts have enough insulation in the form of bedding and mineral wool or polystyrene, then keeping a large number of chickens and critically low temperatures require the installation of a heating system.
Heating can be equipped in several options:
- Boiler. Installation of a gas boiler is suitable for large rooms and large farms.
- Potbelly stove. For furnace heating equipment, a smoke exit system must be installed in advance. To maintain constant heat, you need to keep the heating process under control and stock up on firewood for the winter. A potbelly stove is a good substitute for other systems in terms of heat supply, but is not recommended because of insecurity.
- Electric heating. This type includes heat fans and convectors, heaters, oil radiators. Such heating systems depend on energy supply and can be financially expensive, but they are safe for birds.
- Infrared heating. Today, IR heaters and lamps are considered the best way to heat a chicken coop. They combine optimal energy consumption and safety, and also do not violate the necessary microclimate due to the heating of objects, not air.
- "Warm floor". This option is thought out in advance and installed before laying the concrete floor.
Walking patio
If the air temperature does not drop to an extreme minimum, chickens can go for a walk in the fresh air. For these purposes, a walking yard is equipped near the chicken coop. It should be spacious and protected from all sides.
Did you know? Scientist Joe Edgra proved that chickens have feelings that they can show, among which are sadness, homesickness or relatives, hostility or sympathy for someone, empathy.
In the courtyard you can place a feeder with a drinking bowl. There must also be a fence. As a fence, you can use a wire mesh of sufficient height (at least 2 m): it will protect birds from dangerous animals and the likelihood of flying outside the house.
A properly designed and equipped winter chicken coop will allow to maintain the productivity of birds even in the frosty season. A room with ventilation, heating and other necessary equipment will become a comfortable and reliable home for your chickens.

