"Black" tomatoes have long acquired their supporters and fans due to the excellent taste of the fruit. They do not have the sourness characteristic of many tomato varieties, which not everyone loves. This article discusses how to grow Chocolate Miracle black-fruited tomatoes - from sowing seeds to seedlings to harvesting.
Grade description
Characteristics of tomatoes Chocolate Miracle:
- A variety of medium-early ripening, the first fruits ripen 100-112 days after the emergence of sprouts from the soil. The plant is determinant (with a limited growth point), the height of the bush in open ground is 80–100 cm, and in the greenhouse the plant grows to 150 cm.
- The brush is simple, 5-6 fruits are tied in the brush.
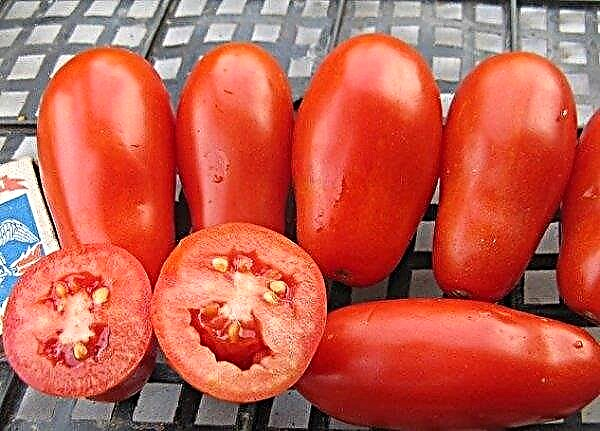
- Fruits are medium and large, rounded, slightly flattened. The taste of the fruit is sweetish, without excessive acid, the color of the tomatoes is burgundy brown.
- The fruit mass varies from 250 to 400 g, the yield of the variety is 10–15 kg per 1 m².
- In unripe form, the fruit has a green spot at the stalk, which disappears in ripe tomatoes.
- The bush forms abundant stepsons, therefore, it requires compulsory shaping, pruning and pinching.
- Tall, crop-laden bushes require additional support.
- It is poorly transported because it has a soft, juicy pulp and a thin skin.
- Tomatoes are used for making salads and for harvesting for the winter - mainly for juice.

Advantages and disadvantages
Like any fruit plant, the tomato variety Chocolate Miracle has both advantages and disadvantages.
- Grade advantages:
- high productivity;
- early ripening;
- large fruits;
- good taste;
- relative resistance to late blight and alternariosis.
Did you know? Tomatoes are able to grow roots anywhere where their stem touches the soil. If you carefully consider the branches of a tomato bush, you can see warty growths. These are the beginnings of the roots, which under suitable conditions will develop into a powerful root system.
- Cons of the variety:
- poor transportability;
- too large for salting;
- a green spot at the stalk.
How to grow seedlings at home
Gardeners obtain the largest tomato harvests from seedlings grown in compliance with the correct temperature regime, irrigation schedules, hardening times and preventive treatments against pests and diseases.
Optimum timing for sowing
The timing of sowing tomato seeds depends on what conditions the vegetable grower can provide young seedlings. If early planting of seedlings in film tunnels or greenhouses is expected (approximately April 15–20), then seeds should be sown around February 20. If tomatoes will be planted in the soil after May 1, then sowing seeds should be in the first decade of March. In order for tomato seedlings to grow, it will take about 1.5–2 months. Experienced growers themselves can calculate the most suitable time for starting sowing.

Tomato seedlings are planted in open or closed ground when the stem reaches a height of 20–25 cm and there are 7–8 real, well-developed leaves on the plant. It is also undesirable to be late with transplanting seedlings - this can lead to the fact that the stems will outgrow, as a result of which it will be more difficult for plants to take root in a new place.
Some growers are too in a hurry to sow seeds in January. As a result, seedlings grow under weak artificial light and at high room temperature. Such seedlings are not very viable, too long, have a thin pale stalk, take root in a new place for a long time and give a small crop.
The soil
Tanks in which tomatoes will grow need to be filled with soil mixture. It can be purchased in gardening shops or prepared independently in the fall: mix peat crumb, humus and meadow soil in equal parts, add a few handfuls of wood ash to the same. Before pouring into the soil in pots, it is advisable to disinfect. This will help to avoid the future development of fungal diseases in tomato seedlings.
Options for soil disinfection at home:
- Boiling water treatment. The earth is abundantly watered with boiling water - this contributes to the destruction of pathogens living in the soil. After the soil has cooled and excess moisture has drained from it, the substrate is ready for sowing.
- Annealing in the oven. The earth is placed on a baking sheet, leveled with a non-thick layer (5-7 cm) and sent to the oven for half an hour at a temperature of +160 ... + 200 ° C. The cooled soil is poured into pots for sowing.
Important! When growing tomatoes in large individual containers (in beer glasses, cut plastic bottles), it is necessary to lay a drainage on the bottom of each container, which will protect the root system from decay. As drainage, you can use pieces of polystyrene foam, fragments of ceramics, trimming wood branches.
Capacity for growing
Tomatoes are not too demanding on containers for growing, so they can grow in pots and crates of different shapes and sizes.
Variants of containers for growing tomatoes:
- large beer glasses of 0.5 l;
- peat pots;
- plastic pallets for seedlings with individual cells;
- pressed peat tablets;
- large wooden or plastic boxes for seedlings.
In any of these containers, the tomatoes will develop well, with a small caveat for pressed peat tablets. These tablets, even of the largest diameter, still have insufficient volume for the tomato root system.

Therefore, plants that have reached a height of 12-15 cm will need larger containers (at least 0.5 l). Such a transplant is very simple, since the root system of tomatoes does not need to be removed from the peat pellets, but placed in a new container with it, and then covered with soil.
Tomato seedlings growing in large seedling boxes also need a pick, which is carried out as soon as 2 pairs of leaves appear on the tomatoes. At the same time, each plant is transplanted into a separate pot, where they will grow before planting in the ground.
Important! The bottom of each container for planting should be equipped with sewage holes. If there are no such openings, excess water after irrigation will stagnate in the root zone, which will lead to illness or death of the plant.
Seed preparation
Seed disinfection before sowing has a beneficial effect on the growth and development of young tomatoes, on the acquisition of immunity to most fungal and bacterial diseases, and, accordingly, on an increase in yield in the future. Pathogens and pests are transmitted from the parent plant to the seeds, and only disinfecting treatment allows them to be neutralized.
The seed material is disinfected in a pale purple solution of water and potassium permanganate for 30-40 minutes, then the treated seeds are washed well in clean water. Sanitized seed is further treated with a growth stimulant.

In garden centers, you can buy chemicals for seed disinfection: Carboxin, Tiuram, or Mankozeb. Chemical treatment of seeds serves as protection against fungal diseases and for young plants grown from them. This protection lasts approximately 30-40 days.
Among gardeners, plant stimulants for seeds and plants are popular, for example, aloe leaf juice and a mixture of honey and water. Seed is immersed in liquid plant stimulants overnight.
After the seeds are removed from the stimulant, they are immediately sown in the soil, or if several days remain before the desired sowing date, put in a refrigerator. Horticultural centers also sell biostimulants for the growth and development of vegetables - Emistim, Baikal, Epin, etc.Important! Treatment with natural growth stimulants such as honey or plant sap will not harm the seed material. And when treating seeds with chemicals for disinfection or stimulation, you must exactly follow the instructions that come with the drugs.
Sowing seeds
- Pour disinfected soil into the pots and moisten it well, after which leave it for several hours to leave excess water from the glass pot.
- In the center of each pot, lay 2 seeds to a depth of 1-1.5 cm, with a distance of 1 cm from each other. A pair of seeds is sown just in case, given the possibility that the germination of the seed material is not 100%. If both seeds hatch, in the future one sprout (the weakest) will need to be removed. This operation is carried out when the first pair of real leaves grows on tomatoes.
- When sowing seeds in large seedling boxes on the ground, pre-make longitudinal recesses (rows) with a depth of 1–1.5 cm, place tomato seeds in them with an interval of 2-3 cm. If the crate is large and there is not much planting material, the interval between plants increase to 8-10 cm.
- Sprinkle the seed material spread over the recesses in the soil with soil and slightly compact it with the palm of your hand. In order not to forget where and which variety is sown, opposite the furrow on the side wall of the box you need to stick a sticker with the name of the variety or write the name of the variety with a marker directly on the side surface of the seedling box. On the side wall of individual pots with crops, it is also worth sticking a pointer with information about the variety.
- Sprinkle the crops sprinkled with soil slightly, after which all individual containers or a large seedling box should be wrapped in polyethylene or foil. Next, transfer the containers to a warm place until sprouts appear on the soil surface.
- In heat, tomatoes sprout quickly. Approximately 1 week after sowing, the first seedlings will appear from the soil, after which the container must be immediately transferred closer to the light - to a window or to a special table for seedlings, illuminated by a phyto-lamp.

Seedling Care
When growing seedlings in the house, it should be properly looked after:
- If initially tomatoes were sown in common planting boxes or in containers too small, then soon seedlings will need a transplant. A picking is carried out after 2 pairs of true leaves are formed on the seedlings, and the stem height will be approximately 12-15 cm. New planting containers for grown seedlings should have a volume of at least 0.5 liters.
- In February-March, young plants require additional lighting. This is easy to do by installing a desk lamp next to the seedlings with a folding body and a daylight bulb. Lighting is turned on in the morning (from 8:00 to 10:00) and in the evening (from 17:00 to 20:00).
- At the age of 3-4 weeks, seedlings need foliar top dressing. For such fertilizer, ready-made sets of minerals for seedlings or any of the growth stimulants (Epin, Emistim) can be used.
How to water seedlings
During the first 2 weeks of life, gentle seedlings are watered very little and only when the topsoil has dried well. Watering is carried out only under the root of the plant, so that the leaves and stem remain dry. These precautions are caused by the fact that at this age, tomatoes are prone to black leg disease. For irrigation use water at room temperature - settled for several days, tap or rain (melt).
Did you know? In a temperate climate, tomatoes are annual plants. However, in the tropics, tomato bushes can grow and bear fruit for several years.
Correct room temperature
Tomatoes love heat, and the optimum temperature for their growth is +18 ... + 25 ° C. If the room is cold, the soil is often covered with mold, and the roots of the tomatoes rot. Such conditions are most optimal for the emergence of a black leg, which within a day can destroy all crops.

The symptom of the appearance of a black leg is black, as if shrunken, sections of tomato stalks in the soil area. When these signs occur, seedlings should be completely stopped watering. It is also necessary to powder the plants and the earth in the aisles with wood ash.
If the room is hot, tomato seedlings grow rapidly and, as a result, stretch, become thinner unhealthily. Such plants, after planting in a permanent place, take root for a long time, get sick, which as a result will surely turn into a lost crop.
Seedling hardening
After the temperature in the street is set to not lower than + 15 ° C, you can begin to harden tomato seedlings by exposing it to open air. To do this, in a private house, plants are taken out into the yard, and in apartments - onto a loggia or balcony. The main principle of hardening: a gradual increase in time spent in the open air.

The first time the plants are taken out for hardening for half an hour, the next day they increase the “walk” time by 10 minutes, and after 14 days the seedlings are already on the street during daylight hours. Now the seedlings are brought into the room only at night. Procedures for hardening tomato seedlings begin about a couple of weeks before planting in the ground.
Important! Containers with tomato seedlings on the street should be placed so that they are in the shade or partial shade of the trees. Hot sun rays will cause burns to immature leaves.
Planting seedlings in a permanent place
When the seedlings reach a height of 20–25 cm, several pairs of adult leaves will appear on it, and the weather will be warm outside - it is time to start planting plants in open ground.
The timing
Chocolate Miracle tomatoes begin to be planted on the garden after the soil reaches a temperature of + 15 ° C. Cold soil does not allow the root system of tomatoes to absorb nutrients. Planted too early, tomatoes build up green mass to the detriment of the root system, which further affects crop yields for the worse.

According to popular belief, the soil on the beds is ready for planting tomatoes when adult leaves appear on birches. This indicates that the soil is well warmed up. In the south, vegetable growers determine the time of planting by the evening singing of cicadas, signaling the arrival of steady heat. In the south, tomatoes can be planted in greenhouses or film tunnels starting in the second decade of April, and in the northern regions from the first decade of May.
Did you know? Tomatoes are rich in lycopene, a valuable antioxidant that can slow the development of atherosclerosis. This substance gives the tomatoes a red color.
Seat selection
Experienced vegetable growers recommend placing tomato beds from south to north. This orientation allows plants to be illuminated by the rays of the sun throughout the day, which contributes to the rapid development of the bush and early ripening of fruits.
If the garden or garden plot is located in such a way that it is blown through by the northern cold wind, it is necessary to create wind-shelter wings around tomato beds from tall plants sown in several rows (corn, sorghum). Tomatoes should not be planted in the garden, where last year representatives of the solanaceous family (tomatoes, eggplant, potatoes, peppers) were already growing.
Good predecessors for tomatoes:
You will be interested to read

- cucumbers
- Beans
- beans;
- soybeans;
- clover;
- cabbage;
- cauliflower;
- greenery;
- bow;
- carrot;
- beet.
Scheme and depth of landing
Chocolate Miracle Tomatoes are rather tall plants, so they are planted according to one of the schemes:
- In 2 rows: the interval between plants is 50 cm, between rows - 60 cm. Tomatoes in rows are planted in a checkerboard pattern relative to plants of another row. Next, a track of 70 cm is laid.
- In 4 rows: between plants a distance of 50 cm, between rows - also 50 cm. Tomatoes are planted in a checkerboard pattern, every 4 rows a meter path is provided.

After marking the beds, vegetable growers prepare planting pits for tomato bushes.The optimal depth of the landing pit is 20–25 cm.
Features of outdoor care
It is not enough to properly grow seedlings and plant tomatoes in a regular place on time. It is very important to ensure proper and timely care of plants: weeding, loosening, watering, preventive and therapeutic treatment for diseases and insects.
Watering
Tomatoes can be grown with watering and without watering. When grown without watering, planting seedlings, pour at least 3 liters of water into each planting hole and plant the plants in the ground as deep as possible, leaving only the top on the surface. More bushes are not watered throughout the growing season.
Growing with watering involves moistening the root system twice a week. Tomatoes on the leaves do not water, as this provokes the development of fungal diseases. There are several ways to irrigate tomato beds: drip irrigation, filling the irrigation ditches (irrigation ditches) with water, and manual irrigation under the root from a garden watering can.Important! It is advisable to avoid watering tomatoes with cold water from a water supply system or a well - it should be preheated in the sun for 5-6 hours.
Water the tomatoes regularly. Sharp fluctuations from drying out the soil to copious moisture provoke the development of vertex rot on the fruits of tomatoes. During drought, the plant cannot receive calcium from the soil, and vertex rot is directly related to the lack of this mineral.
Top dressing
Fertilizing tomato beds is carried out during flowering and during fruit loading. Top dressing can be done in 2 ways: by leaf and under the root. Good root dressings are made from bird droppings. To do this, you need to collect half a bucket of bird droppings, top up the tank with water and put for 1 week in a sunny place for fermentation.

The container with litter solution must be tightly closed with a lid and mix the contents of the bucket daily. Before top dressing, concentrated fertilizer should be diluted with water (0.5 l of concentrate per 1 bucket of water). On a leaf, tomatoes are fed with finished mineral fertilizers.
Stepson
Like all medium-tall and tall varieties, Chocolate Miracle needs to be formed, and for this an agronomic technique such as pinching is carried out. In the southern regions, tomatoes are grown in 3 stems, in the northern regions - in 2 stems.
Important! It is not recommended to leave stepchildren growing from the ground - flowering and ovary on them occur late, yield is weak, and they significantly delay the general development of the bush.
How to pinch and form a bush:
- A few weeks after planting, the young bushes adapt to new conditions and begin rapid growth by the root system of the aerial mass. Pasynkovanie bushes begin about 25-30 days after planting.
- Stepchildren are new stems growing from the junction of the main stem and leaf. When forming in 3 stems, the main stem and 2 lateral stepson remain on the plant, all the rest are removed (manually plucked or cut with secateurs). The formation of 2 stems is done in the same way, but only 1 lateral stepson and main stalk are left.

Soil care
The soil on the tomato in the garden requires constant care and care from the gardener:
- Weeding. 2 weeks after planting, the garden is weeded. This procedure will have to be carried out regularly throughout the summer. Weeding allows not only to rid the soil of weeds, but also to avoid thickening in the garden and competition between cultivated and weed plants for nutrients and moisture. At the same time, the soil is saturated with oxygen (aeration).
- Hilling. During the second weeding, tomato bushes are high up in soil in the root zone. This procedure promotes the formation of additional roots, which will strengthen the bush and accelerate the ripening of tomatoes.
- Mulching. So that the gardener does not need to weed the beds and often water them, it is recommended to cover the soil between the plants (mulch). As mulch, you can use sawdust (not coniferous), hay or non-woven agrofiber (spunbond). Mulch prevents the evaporation of moisture from the soil and overheating of the roots in the summer heat.
Tying bushes
Since Chocolate Miracle tomato is a large-fruited and productive variety, its stems and branches during ripening require additional support. To do this, next to each bush, an individual package is installed in the form of a peg of wood or metal, to which fruit branches are tied with a nylon cord. Also along the row of tomatoes, you can install a metal long trellis to support all the plants in the row.
Preventative treatment
In order to prevent the development of diseases on the bushes, as well as to prevent the attack of insect pests, it is necessary to carry out preventive treatment of the aerial mass of plants. At the first signs of pests, the tomatoes are treated with insecticides ("Karate," Aktara ") or biological agents (decoctions of nettle, wormwood, dandelion leaves).

Preventive treatment for fungal and bacterial diseases is better to begin even before the onset of symptoms of the disease. This treatment is carried out with preparations containing copper (fungicides). Also, for processing on the sheet, biological products are used: whey or kefir.
The first preventive treatment of bushes is carried out 25-30 days after transplanting, each subsequent 14 days. Up to 3 prophylactic treatments with fungicides (Tomato, Tatu, Oksikhom) and any number of times with biological preparations are carried out per season.
Harvesting
Harvesting tomatoes can begin without waiting for the ripeness of the fruit, as this crop is capable of ripening (ripening outside the mother plant). When picking tomatoes in the brown ripeness phase, the bush is unloaded, which contributes to the rapid formation and weight gain of fruits in other fruit brushes.

The faster the first crop is harvested (from the lower brushes), the more fruits will be harvested from each plant per season. Chocolate Miracle Tomatoes have a large and juicy fruit, so they do not tolerate transportation very well. D
For transportation over long distances, only brown fruits are chosen - during transportation they will acquire the color and taste characteristic of the variety. Fans of "black" tomatoes will surely like the fruits of the Chocolate Miracle variety - large, juicy and sweet. This productive and disease-resistant variety will take its rightful place in your garden.


